
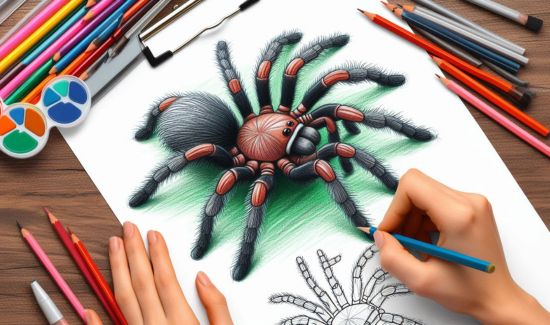
Drawing a tarantula can seem intimidating, but it doesn’t have to be! Whether you’re an aspiring artist or simply want to try something new, this guide will help you create a stunning tarantula drawing. With easy-to-follow steps, helpful tips, and clear instructions, you’ll be able to draw a tarantula in no time. Plus, we’ll make sure the process is fun and creative. This guide is perfect for students, beginners, or anyone looking to enhance their artistic skills.
Introduction
Table of Contents
Drawing a tarantula might sound challenging, but with a little guidance, it can be an enjoyable and rewarding experience. Tarantulas are fascinating creatures with intricate details that make them a great subject for art. This guide will walk you through each step, making it easy for you to draw your very own tarantula. By the end of this article, you’ll not only have a cool drawing but also a better understanding of these amazing spiders. Let’s get started!
Table of Information
| Step | Description | Key Points |
|---|---|---|
| 1. Basic Shapes | Start with simple circles and ovals to outline the body and legs. | Focus on proportions and placement. |
| 2. Add Details | Draw the tarantula’s eyes, fangs, and leg segments. | Pay attention to the spider’s unique features. |
| 3. Refine Lines | Smooth out the shapes and add details like hairs and textures. | Use light strokes to create a realistic effect. |
| 4. Shading | Add shading to give the tarantula depth and dimension. | Focus on light sources and shadows. |
| 5. Final Touches | Erase unnecessary lines and make final adjustments to your drawing. | Review your work and make any final improvements. |
Materials Needed
Before we start drawing, let’s gather all the necessary materials:
- Pencil (preferably a 2B or 4B for sketching)
- Eraser
- Paper
- Black pen or marker (for outlining)
- Colored pencils or crayons (optional, for coloring)
Having the right materials will make your drawing experience smoother and more enjoyable.
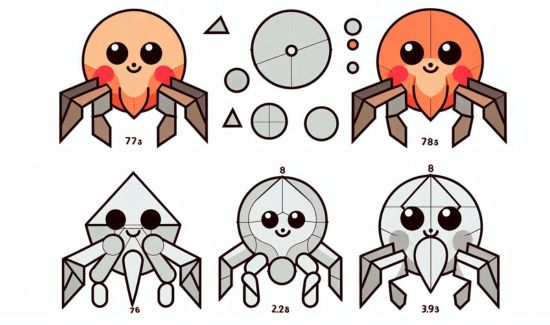
Step 1: Start with Basic Shapes
Begin by drawing a large oval shape for the tarantula’s body. Next, draw a smaller circle for the cephalothorax (the head section). For the legs, draw long oval shapes that extend from the cephalothorax. These basic shapes will serve as the foundation for your tarantula drawing.
- Tip: Make sure the legs are evenly spaced and extend outward to give your tarantula a realistic look.
Step 2: Add Details
Once the basic shapes are in place, start adding details to the tarantula. Draw small circles for the eyes, which are located on the cephalothorax. Add small fangs beneath the eyes, and start drawing the segments of the legs. Tarantulas have eight legs, so make sure you include all of them in your drawing.
- Tip: Use reference images of real tarantulas to capture their unique features accurately.
Step 3: Refine the Lines
Now that you have the basic shapes and details, it’s time to refine your drawing. Smooth out the shapes and add more details to the tarantula’s body and legs. Pay attention to the hairs on the tarantula’s legs and body, as these are important features that make your drawing look more realistic.
- Tip: Use light, short strokes to create the appearance of hair.
Step 4: Add Shading
Shading is essential to give your tarantula drawing depth and dimension. Determine where the light source is coming from and shade accordingly. Darken the areas that are in shadow and leave the lighter areas untouched.
- Tip: Use a blending tool or your finger to smooth out the shading for a more polished look.
Step 5: Final Touches
Erase any unnecessary lines and make final adjustments to your drawing. You can also outline your tarantula with a black pen or marker to make the drawing stand out. If you want to add color, use colored pencils or crayons to enhance your tarantula’s appearance.
- Tip: Don’t be afraid to experiment with colors. Tarantulas come in various shades, so you can get creative!
Tips for Beginners
Drawing a tarantula can be tricky, but don’t get discouraged. Here are some extra tips to help you along the way:
- Practice: The more you practice, the better you’ll get. Try drawing multiple tarantulas from different angles to improve your skills.
- Use References: Look at photos of real tarantulas to capture their unique features.
- Be Patient: Take your time and don’t rush the process. Drawing is all about enjoying the journey.
Common Mistakes to Avoid
When drawing a tarantula, beginners often make a few common mistakes. Here’s how to avoid them:
- Incorrect Proportions: Ensure the tarantula’s body and legs are proportionate.
- Lack of Detail: Don’t skip the small details like hairs and textures. These make your drawing more realistic.
- Over-Shading: While shading is important, overdoing it can make your drawing look messy. Balance is key.
Conclusion
Drawing a tarantula can be a fun and rewarding experience, especially when you break it down into simple steps. By following this guide, you’ll be able to create a realistic and impressive tarantula drawing. Remember to practice, be patient, and enjoy the process. With time, you’ll improve your skills and be able to draw even more complex creatures. So grab your pencils and get started on your tarantula drawing today!
FAQs About Tarantula Drawing Easy
1. What materials do I need to draw a tarantula?
You’ll need a pencil, eraser, paper, black pen or marker, and optional colored pencils or crayons.
2. How can I make my tarantula drawing look realistic?
Focus on details like the tarantula’s eyes, fangs, and hair. Shading is also important to give the drawing depth.
3. How long does it take to draw a tarantula?
It depends on your skill level, but it typically takes about 30 minutes to an hour.
4. Can I color my tarantula drawing?
Yes! Tarantulas come in various colors, so feel free to use colored pencils or crayons to add color to your drawing.
5. What if I make a mistake while drawing?
Don’t worry! You can always erase and redraw. Practice makes perfect, so keep trying until you’re happy with your drawing.